Pizza fontina
Homemade pizza is better. Here's how it's done.
Pizza is bread. It's not about the sauce and cheese; it's not about the veggies and meats. Those are condiments. Pizza is bread. You assemble a simple yeast dough, flatten it out, top it with a modest array of appropriate tasty morsels, and bake it at the highest temperature your oven will muster.
Here's what I don't like about the pizza I don't like: I don't like greasy pizza, I don't like really thin crust pizza, I don't like pizza made with gummy pseudocheese, I don't like whole wheat pizza, and I don't like pizza with misplaced "gourmet" ingredients on it. I haven't tried the Wolfgang Puck pizza with smoked salmon, dill cream, and caviar. Not interested. Here's what I do like: a crusty crust and an airy, moist crumb. Give me that with nothing on it but salt and I'm happy.
Haverchuk will now offer its first bona fide recipe:
Pizza dough
14 oz. all-purpose flour
1 tsp. instant yeast
1.5 tsp. kosher salt
1 tbs. sugar
1 tbs. extra virgin olive oil
1 cup warm water
How you assemble the dough is a matter of personal preference. You may use a bowl, a food processor, a standing mixer, or none of these. I prefer the last. No matter the tools the method is the same: dump the wet into the dry and combine them into a dough ball. But here's a tip: reserve about half a cup of the flour at first and see if it will come together without it. Then use this as your bench flour to keep your hands and the dough from sticking. You do this because the moisture content of both the flour and the air are both variable and some flours are thirstier than others. It's much easier to add more flour to a wet dough than to add more water to a dry dough. Once it's assembled you knead the dough for a few minutes--it is possible to knead too much, especially using a machine. I prefer doing this by hand for this reason but also because I'm the one who cleans up and I don't like cleaning food processors or standing mixers.
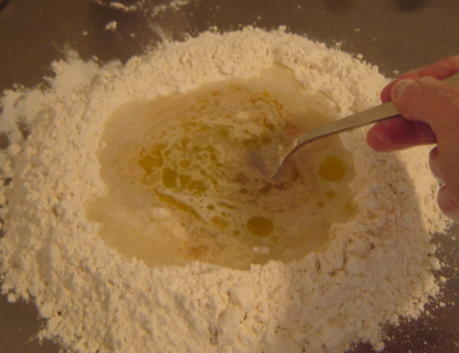
I like to assemble bread doughs on the countertop. Here I made a mound of flour and hollowed out its center.

I added the rest of the dry ingredients to the flour and then poured in the wet. I stirred with a fork, bringing the flour from the bottom of the walls of the reservoir into the middle slowly. The first time (and the second and third time) I did this I broke the walls and water went everywhere. But I kept trying and now I'm good at it.

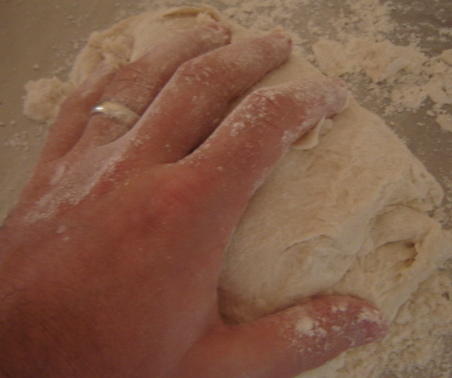
When it came together I began to knead.

And after a few minutes it looked like this. The point of kneading dough is to stretch out the strands of gluten that give it structure. Nice long strands will take the breath given by the yeast and rise to form an airy network of crumb. (Crumb is baker lingo for the part of the bread that isn't crust, FYI.)

I put the dough in a greased bowl, covered it, and left it to rise in the humid hallway (the kitchen is air conditioned and yeast doughs like warm, humid places to rise). Now here's some advice to novice bread bakers: be flexible. It might take your dough a few hours to rise, or it might take it only 75 minutes. It all depends on the temperature and humidity. When it's risen to twice its original volume, deflate it gently and let it rise some more. Yeast dough will work around your schedule. If you want it to rise for five hours because you're going to be out of the house, try using half the yeast. It will probably take about twice as long to rise. Or let it rise in the refrigerator, even overnight. Warmth accelerates yeast growth; cold slows it down. Don't watch the clock, watch your dough.
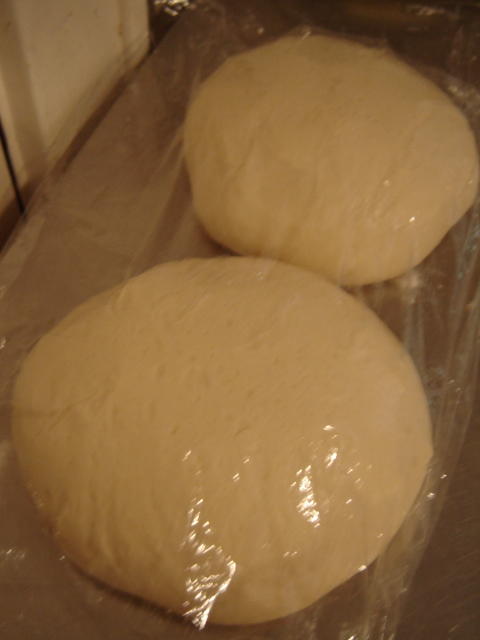
When it had risen (a couple of hours later), I divided the dough in two and let it rise again on the countertop.

I assembled some condiments: sauteed onions and cremini mushrooms and shredded Italian fontina cheese. That's right, no sauce. I got this combination from the Cheesecake Factory, a chain of upscale suburban restaurants where you wait two hours for a table and are then fed thousands of calories of focus-group-tested, "Cheesecake-ized" foods. I long ago vowed never to eat there again, but the pizza I ripped this off of was yummy.

I also slid a baking stone into the oven and preheated to 500 degrees. Over the years I managed to break several of these stones, all of them flimsy, and finally bought a heftier one from a restaurant supply house. Without a baking stone you can't get a crisp crust, and if you can't get a crisp crust you don't have great pizza. You need to preheat the oven at least an hour before baking so that the ceramic stone can absorb lots of heat, which it needs to make your crust crisp.
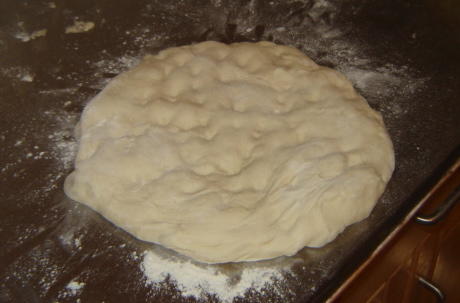
When I was ready to bake I flattened the dough with my fingertips.

Then I stretched it out over my two fists and tossed it in the air a few times like a real pizzaiolo. If I had a third hand I would have photographed this dramatic moment. I then spread the dough out on my paddle and covered it in toppings.

It is a bit tricky to thrust the pizza off the wooden peel and onto the stone. You have to give a good jerk on the handle to retract it back without making a mess of the pie. Sure, I have made a mess once or twice.
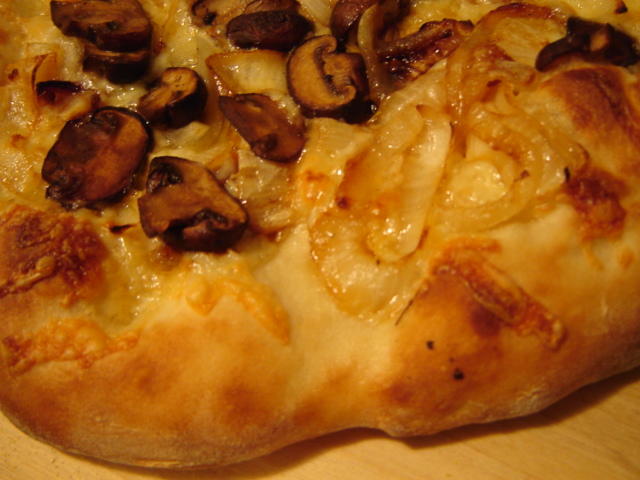
When it's done it looks like this.

I don't need to describe it, do I?
Pizza is bread. It's not about the sauce and cheese; it's not about the veggies and meats. Those are condiments. Pizza is bread. You assemble a simple yeast dough, flatten it out, top it with a modest array of appropriate tasty morsels, and bake it at the highest temperature your oven will muster.
Here's what I don't like about the pizza I don't like: I don't like greasy pizza, I don't like really thin crust pizza, I don't like pizza made with gummy pseudocheese, I don't like whole wheat pizza, and I don't like pizza with misplaced "gourmet" ingredients on it. I haven't tried the Wolfgang Puck pizza with smoked salmon, dill cream, and caviar. Not interested. Here's what I do like: a crusty crust and an airy, moist crumb. Give me that with nothing on it but salt and I'm happy.
Haverchuk will now offer its first bona fide recipe:
Pizza dough
14 oz. all-purpose flour
1 tsp. instant yeast
1.5 tsp. kosher salt
1 tbs. sugar
1 tbs. extra virgin olive oil
1 cup warm water
How you assemble the dough is a matter of personal preference. You may use a bowl, a food processor, a standing mixer, or none of these. I prefer the last. No matter the tools the method is the same: dump the wet into the dry and combine them into a dough ball. But here's a tip: reserve about half a cup of the flour at first and see if it will come together without it. Then use this as your bench flour to keep your hands and the dough from sticking. You do this because the moisture content of both the flour and the air are both variable and some flours are thirstier than others. It's much easier to add more flour to a wet dough than to add more water to a dry dough. Once it's assembled you knead the dough for a few minutes--it is possible to knead too much, especially using a machine. I prefer doing this by hand for this reason but also because I'm the one who cleans up and I don't like cleaning food processors or standing mixers.
I like to assemble bread doughs on the countertop. Here I made a mound of flour and hollowed out its center.

I added the rest of the dry ingredients to the flour and then poured in the wet. I stirred with a fork, bringing the flour from the bottom of the walls of the reservoir into the middle slowly. The first time (and the second and third time) I did this I broke the walls and water went everywhere. But I kept trying and now I'm good at it.
When it came together I began to knead.
And after a few minutes it looked like this. The point of kneading dough is to stretch out the strands of gluten that give it structure. Nice long strands will take the breath given by the yeast and rise to form an airy network of crumb. (Crumb is baker lingo for the part of the bread that isn't crust, FYI.)

I put the dough in a greased bowl, covered it, and left it to rise in the humid hallway (the kitchen is air conditioned and yeast doughs like warm, humid places to rise). Now here's some advice to novice bread bakers: be flexible. It might take your dough a few hours to rise, or it might take it only 75 minutes. It all depends on the temperature and humidity. When it's risen to twice its original volume, deflate it gently and let it rise some more. Yeast dough will work around your schedule. If you want it to rise for five hours because you're going to be out of the house, try using half the yeast. It will probably take about twice as long to rise. Or let it rise in the refrigerator, even overnight. Warmth accelerates yeast growth; cold slows it down. Don't watch the clock, watch your dough.
When it had risen (a couple of hours later), I divided the dough in two and let it rise again on the countertop.
I assembled some condiments: sauteed onions and cremini mushrooms and shredded Italian fontina cheese. That's right, no sauce. I got this combination from the Cheesecake Factory, a chain of upscale suburban restaurants where you wait two hours for a table and are then fed thousands of calories of focus-group-tested, "Cheesecake-ized" foods. I long ago vowed never to eat there again, but the pizza I ripped this off of was yummy.

I also slid a baking stone into the oven and preheated to 500 degrees. Over the years I managed to break several of these stones, all of them flimsy, and finally bought a heftier one from a restaurant supply house. Without a baking stone you can't get a crisp crust, and if you can't get a crisp crust you don't have great pizza. You need to preheat the oven at least an hour before baking so that the ceramic stone can absorb lots of heat, which it needs to make your crust crisp.
When I was ready to bake I flattened the dough with my fingertips.
Then I stretched it out over my two fists and tossed it in the air a few times like a real pizzaiolo. If I had a third hand I would have photographed this dramatic moment. I then spread the dough out on my paddle and covered it in toppings.

It is a bit tricky to thrust the pizza off the wooden peel and onto the stone. You have to give a good jerk on the handle to retract it back without making a mess of the pie. Sure, I have made a mess once or twice.
When it's done it looks like this.
I don't need to describe it, do I?
posted by mzn at 9:18 PM
![]()


0 Comments:
Post a Comment
<< Home